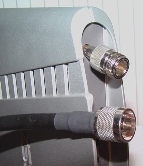
Because of the problems i had with getting my Wii Game Console onto Wi-Fi and the fact that i screwed-up my Asus Accesspoint by connecting it to a to heavy cable so the plug broke.. I decided i deserved a new Accesspoint.


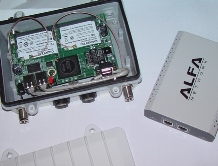
I ordered an Outdoor Enclosure (NM3020) with an Avila Gateworks GW2348-4 board with 4 Gigabyte MiniPCI Wi-Fi cards (GN-WI01HT) and a Alfa 48v PoE Injector from the DD-WRT shop.
You might ask: "Why a PoE injector, don’t you have a PoE network switch?". Well, YES i have a Cisco PoE switch, but the GW2348 board is not 802.3af Compliant. Probably because the full board uses 8 Watt, +4 Watt for each Gigabyte MiniPCI NIC so it can totally use up to 24 Watt. The 802.3af specification is max 15.4 Watt.
Once i had my stuff, there was no quick-installation manual so i had to find out some things, a brief tutorial follows:
1) Connect a Serial cable to GW2348 board and connect with Telnet/Hyperterminal using: 115200,8,N,1, no hardware/software flow control.
2) Power on the GW2348 board and hit CTRL-C (within the first 12 sec. or so), you will now see a "Redboot>" interface. (Download the Redboot user guide and take a look at the Command and Examples if you want although you don’t need it for this tutorial).
3) Setup a TFTP Server on your network (i.e.: SolarWinds Free TFTP Server) and host the file: linux.bin (which is available at the DD-WRT download page > XScale > Avila Gateworks ).
4) Type fconfig at the Redboot interface and configure the boot-script, IP address, Subnetmask and Gateway address of the board as well as the Default Server (which is the default IP address of your TFTP server). Mine looks like this:
RedBoot> fconfig
Run script at boot: true
Boot script:
..<doesn’t matter what is in here… we define our bootscript below>..
Enter script, terminate with empty line
>> fis load linux
>> exec
>>
Boot script timeout (100ms resolution): 25
Use BOOTP for network configuration: false
Gateway IP address:
Local IP address: 192.168.0.241
Local IP address mask: 255.255.255.0
Default server IP address: 192.168.0.3
Console baud rate: 115200
GDB connection port: 9000
Force console for special debug messages: false
Network debug at boot time: false
Default network device: npe_eth0
Update RedBoot non-volatile configuration – continue (y/n)? y
… Unlock from 0x50fe0000-0x51000000: .
… Erase from 0x50fe0000-0x51000000: .
… Program from 0x03fd0000-0x03ff0000 at 0x50fe0000: .
… Lock from 0x50fe0000-0x51000000: .
RedBoot>
5) Now download the the linux.bin file from your TFTP server using:
fis init -f
load -r -v -b 0x00800000 linux.bin
fis create linux
6) now type fconfig again and set the same settings as before (also save again).
7) Power off the GW2348 board and power it on again. You see the whole boot sequence on the Telnet/Hyperterminal console (since you’re still having the Serial cable connected). It will show your System code and ask for an Activation Code which i’ve got from the DD-WRT shop, after entering the long code the unit will reboot and finally shows a DD-WRT login prompt. Login with username: root and password: admin
8) Set the DD-WRT IP Address of the unit (we did set the Reboot IP Address before but we now set the real ip address the unit is going to use).
Type: "ip addr" to show a list of interfaces and ip address. Especially look for eth0 and br interfaces. Don’t look at any 169.xxx.xxx.xxx ip addresses.
I had to delete an existing ip address from the br0 device using:
ip addr del 192.168.1.1/24 brd 192.168.1.255 dev br0
Now i add an ip using:
ip addr add 192.168.0.241/24 brd 192.168.0.254 dev br0
(Verify the ip addresses again with the "ip addr" command)
9) Now disconnect the serial cable, open a browser and go to: http://<ip-address-of-your-unit>/, the username/password is still: root/admin. First go to the Setup page and setup the IP address (it’s still a wrong IP), then save and apply, now you can configure the rest of DD-WRT, have fun !
More information about the GW2348 board and DD-WRT can be found at the DD-WRT Wiki.
Very good photos, but do you have?. I like to see photos of equipment ;-). On the box you use, do you know which manufacturer is? It shows somewhere?. Thanks.
greetings